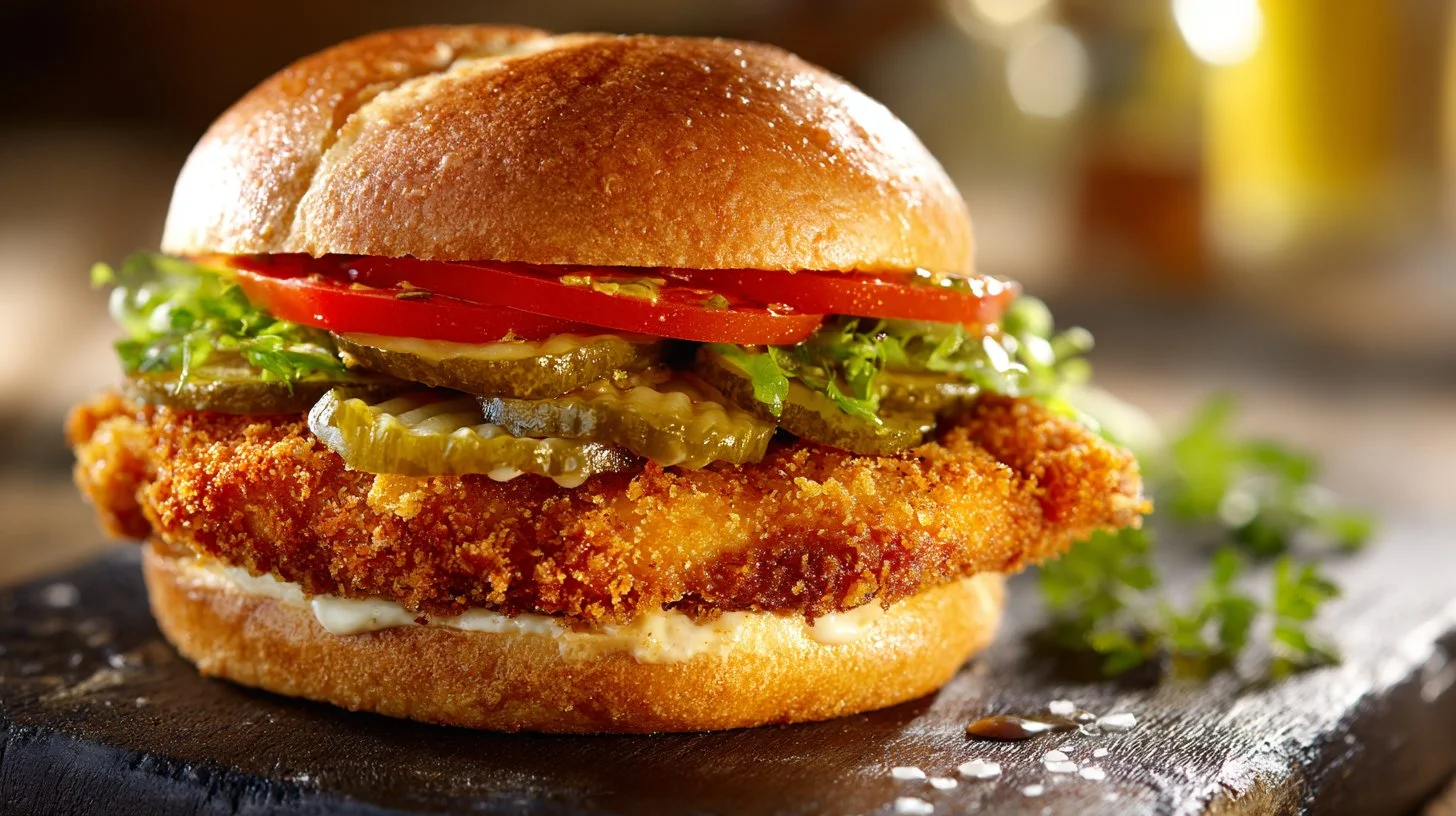
Ready to elevate your meal game? This delightful dish is not just another weeknight option; it’s a culinary experience that pleases both the palate and the senses. Picture golden-brown chicken, perfectly crisp on the outside while remaining juicy inside, layered with fresh vegetables and bold condiments all snuggled in a soft bun. Each bite offers a delightful contrast of textures and flavors that come together beautifully, making it a fantastic choice for gatherings or a tasty weekend meal. Let’s dive into the details and learn how to master this dish in your own kitchen!
Quick Snapshot: What You’re Getting (In Plain English)
- Prep Time: 15 minutes; Cook Time: 15 minutes; Total: 30 minutes
- Difficulty: Easy; Servings: 4; Perfect for: Lunch, Dinner, or Casual Gatherings
- Key Flavor Notes: Savory, tangy from pickles, and a touch of zip from optional condiments; Texture Promise: Crispy on the outside, juicy on the inside!
The “Why It Works” That Actually Helps You Cook
The breading technique creates a sturdy and flavorful crust that locks in moisture, enhancing the chicken’s tenderness. Tenderizing the chicken breasts ensures an even cook, making each piece succulent. The combination of seasoned flour, eggs, and crunch from Panko breadcrumbs transforms an ordinary protein into a dish that shines. Pay careful attention to oil temperature when frying; too hot can lead to burnt exteriors, while too cool makes for soggy chicken. Mastering this frying technique is key to achieving the desired crispiness while keeping the meat moist.
The Ingredient Lineup (Plus Smart Swaps That Won’t Ruin It)
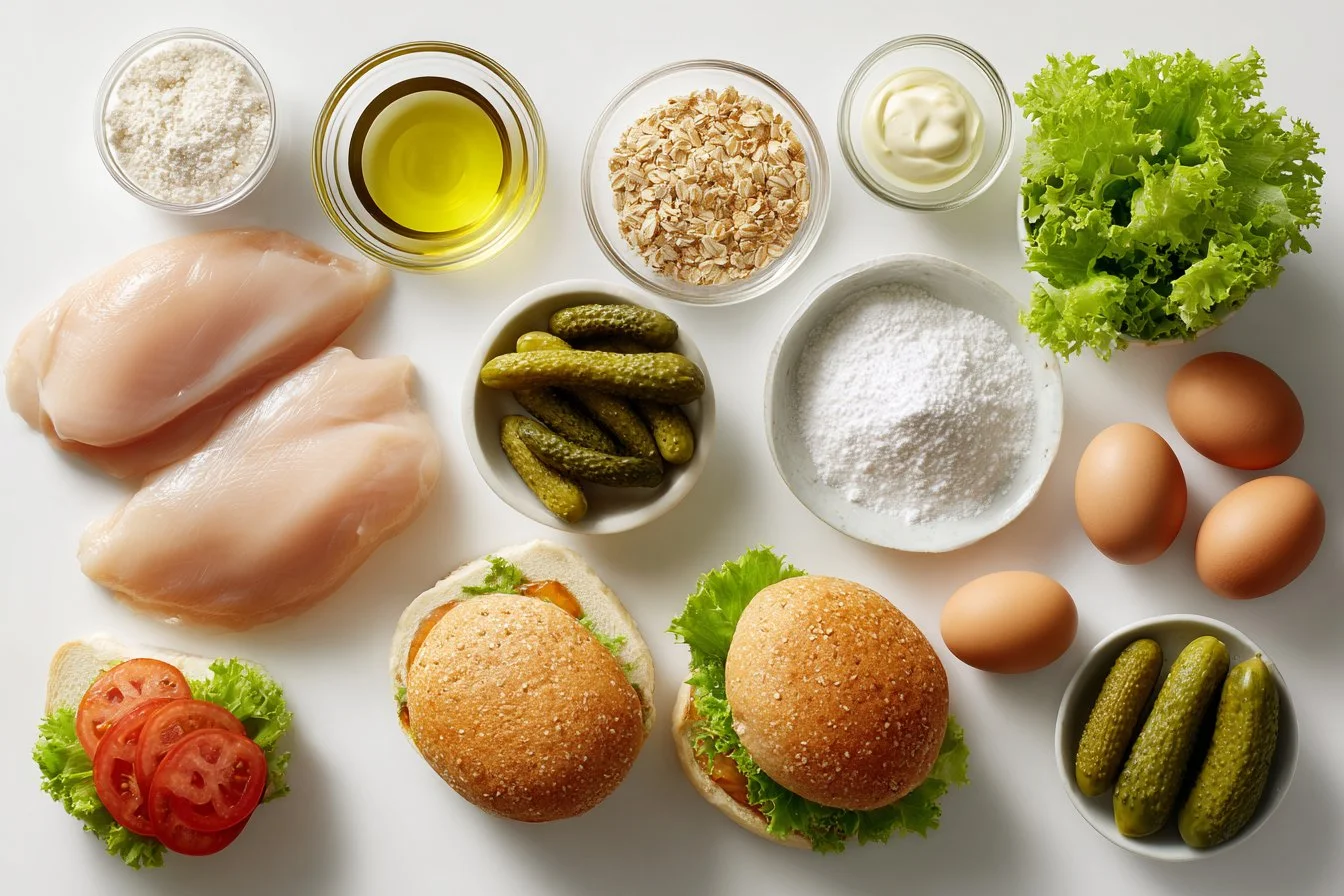
- 4 chicken breasts – use boneless for ease or thighs for added flavor
- 1 cup dill pickles, sliced – opt for bread-and-butter pickles for a sweeter crunch
- 4 hamburger buns or sandwich rolls – swap for whole grain or gluten-free alternatives
- 1 cup all-purpose flour – substitute with a gluten-free blend if needed
- 2 eggs, beaten – a flax egg works well for a vegan option
- 1 cup breadcrumbs – Panko adds extra crunch; try seasoned breadcrumbs for an additional flavor boost
- Salt and pepper, to taste – feel free to experiment with spices like smoked paprika or garlic powder
- Oil for frying (vegetable or canola oil recommended) – peanut oil can elevate the flavor if desired
- Lettuce for crunch – choose romaine or butter lettuce for better texture
- Sliced tomatoes for freshness – heirloom tomatoes can add a sweeter, richer taste
- Mustard or mayo for optional flavor – chipotle mayo can introduce a spicy zing!
Do This, Then This: The Foolproof Step-by-Step
- Begin by tenderizing the chicken breasts using a meat mallet for an even cook. This step ensures each piece will be juicy and flavorful.
- Generously season both sides of the chicken with salt and pepper to enhance the overall taste.
- Set up your breading station with three separate bowls: one for flour, one for beaten eggs, and one for breadcrumbs.
- Dredge each seasoned chicken breast in the flour, making sure it is fully coated, then dip into the beaten eggs, and finally press into the breadcrumbs for an even, thick layer of coating.
- Heat half an inch of oil in a skillet over medium-high heat; it is ready when it shimmers but isn’t smoking. This is crucial for achieving that perfect fry.
- Carefully place the breaded chicken in the hot oil, frying for about 5-7 minutes on each side until a golden brown crust forms, ensuring the internal temperature reaches 165°F.
- For extra flavor, toast your buns in the skillet during the last few minutes of frying.
- Assemble the sandwich by placing one crispy chicken breast on the bun, layering with dill pickles, crisp lettuce, and fresh tomato slices. Drizzle mustard or mayo if desired.
- Serve immediately to enjoy the best texture and flavor.
Flavor + Texture: What You Should Notice in Every Bite
Each bite unveils a flavor journey: the rich, savory notes of the seasoned chicken meld with the tangy brightness of dill pickles. The crunch of the breading adds a satisfying texture, while the meat beneath remains succulent and tender. The fresh crunch of lettuce balances the richness, while the juicy tomatoes bring a pop of freshness. For those wanting an extra kick, a hint of yellow mustard or creamy mayo contributes an additional layer of taste. To elevate flavor further, feel free to consider fresh herbs or spicy variants of condiments—each adjustment adds new dimensions to this delectable experience.
Make Weeknight Meals Effortless with Quick Prep Techniques
Maximize your efficiency in the kitchen by prepping ingredients ahead of time. Have your chicken breasts tenderized and seasoned in advance for up to two days. Set aside your breading station so that when it’s time to cook, assembly is quick and easy. This way, you can enjoy delicious, home-cooked meals even on the busiest nights without compromising on flavor or quality. Slicing pickles and prepping extra toppings in advance further streamlines mealtime, making this dish a fantastic option for more than just casual occasions.
Create a Crispy Outside with Proper Breading Techniques
Mastering the art of breading ensures that chicken maintains optimal crispiness while frying. Ensure that each piece is thoroughly coated in flour, eggs, and breadcrumbs; the three-step process helps create that coveted crunchy exterior. If time allows, refrigerate the breaded chicken for about 30 minutes before frying—this helps the coating adhere better during cooking, preventing any undesirable sogginess. Always check the oil temperature before frying; a consistent medium-high heat is crucial to achieving that perfect crunch without burning.
Elevate Your Dish with Easy Flavor Swaps
Substituting ingredients is a great way to customize your dish. Instead of standard dill pickles, consider spicy jalapeño slices for a heat-infused kick. For a gourmet touch, add a slice of aged cheddar cheese as it melts to gooey perfection. Experiment with different types of mustard or Aioli for a refined flavor twist. If you’re interested in reducing calories without sacrificing taste, swap traditional mayonnaise with Greek yogurt for a creamy, tangy alternative. The goal is to ensure that even with substitutions, the final dish remains satisfying and delicious!
Storing Leftovers Without Sacrificing that Crunchy Texture
For any leftovers, it’s best to store the components separately if possible. Keep the chicken in an airtight container in the refrigerator, where it’ll remain fresh for up to three days. To reheat, use an air fryer to maintain crispiness instead of a microwave, which can result in a soggy texture. Buns can be stored at room temperature but wholes or untouched should be frozen to preserve freshness. If made in bulk, consider preparing extra crispy chicken to have on hand for quick meals throughout the week!
Common Mistakes (And the Fast Fix for Each One)
- **Under-seasoning the chicken**: Always ensure to season generously with salt and pepper before cooking for robust flavor.
- **Sogginess in the coating**: Make sure the oil is hot enough before frying; a temperature check can save the texture!
- **Burning the exterior**: Lower the heat slightly if browning occurs too quickly; adjust as needed for even cooking.
- **Under-cooking the chicken**: Use a meat thermometer to check that the thickest part of the chicken reaches 165°F for safety.
- **Bun overdrying**: Monitor while toasting to prevent burning; remove as soon as they’re golden brown.
- **Wasting leftovers**: Store components separately, and consider using the breading technique on fresh vegetables for a new meal!
Make It Yours: 6 Variations That Still Keep the Recipe Solid
- **Barbecue Chicken Sandwich**: Add a layer of barbecue sauce atop the chicken before assembling for a smoky flavor boost.
- **Buffalo Style**: Toss fried chicken in Buffalo sauce and top with blue cheese crumbles for a spicy kick.
- **Asian Twist**: Marinate chicken in soy sauce and ginger before frying, then top with pickled carrots and daikon.
- **Caprese Twist**: Add fresh mozzarella and basil with balsamic glaze in place of pickles and tomatoes for a fresh take.
- **Cheesy Meltdown**: Top the chicken with a melty slice of pepper jack cheese right after frying for a creamy texture.
- **Vegan Variant**: Replace chicken with crispy fried cauliflower or portobello mushrooms for a satisfying vegetarian dish.
Quick Answers Before You Start
Can I make this dish ahead of time?
Yes! You can prepare and bread the chicken in advance, then fry it when you’re ready to serve or enjoy chilled if desired.
How do I make it gluten-free?
You can easily substitute all-purpose flour with a gluten-free flour blend, and use gluten-free breadcrumbs to maintain the delicious crunch.
Can leftovers be reheated?
To maintain crispiness, it’s best to use an air fryer, reheating at 350°F for about 5-7 minutes or until warmed through.
Is there a dairy-free version?
Yes! You can use dairy-free alternatives like vegan mayonnaise or omit sauces entirely. The flavors from seasonings will still shine.
How can I adjust the spice level?
Add sliced jalapeños or a spicy aioli for a fiery twist, or choose milder pickle varieties for a more balanced flavor.
What are some good side dishes?
Pair with coleslaw, sweet potato fries, or a fresh garden salad to complete the meal beautifully.
Final Notes (So You Nail It the First Time)
Get ready to impress everyone at your table with this sensational dish that captures the essence of comfort food with a modern twist. It’s a recipe brimming with flavor and texture, designed to make you feel like a culinary master. Don’t hesitate—save or print this recipe and make it tonight for a dinner that everyone will rave about!