
Indulging in delightful cookies ignites joy, especially when they meld irresistible flavors together. Picture delicious morsels packed with creamy crunch, vibrant colors, and hints of nostalgia that create an atmosphere of festivity. As you bite into these delightful creations, the balance of sweetness and texture dances on your palate, making every moment special. Perfect for sharing, gifting, or simply enjoying yourself, these treats truly capture the essence of celebration, whether it’s a romantic occasion or a fun get-together with friends.
Quick Snapshot: What You’re Getting (In Plain English)
- Time: 30 minutes; Difficulty: Easy; Servings: About 12 cookies; Best Occasion: Valentine’s Day or any celebration.
- Flavor Notes: Sweet chocolate crunch, buttery richness, and a pop of color from M&M’s; promises a chewy yet crisp texture.
The “Why It Works” That Actually Helps You Cook
By creaming the butter and sugars before adding the egg and dry ingredients, you create a fluffy base that introduces air into the mix, resulting in soft, chewy cookies. The addition of crushed cookies not only amplifies flavor but also provides delightful texture contrasts, making every bite a taste adventure. Focusing on the baking time is crucial; underbaking slightly allows the cookies to remain soft, while letting them go just a minute longer will turn them crisp at the edges.
The Ingredient Lineup (Plus Smart Swaps That Won’t Ruin It)
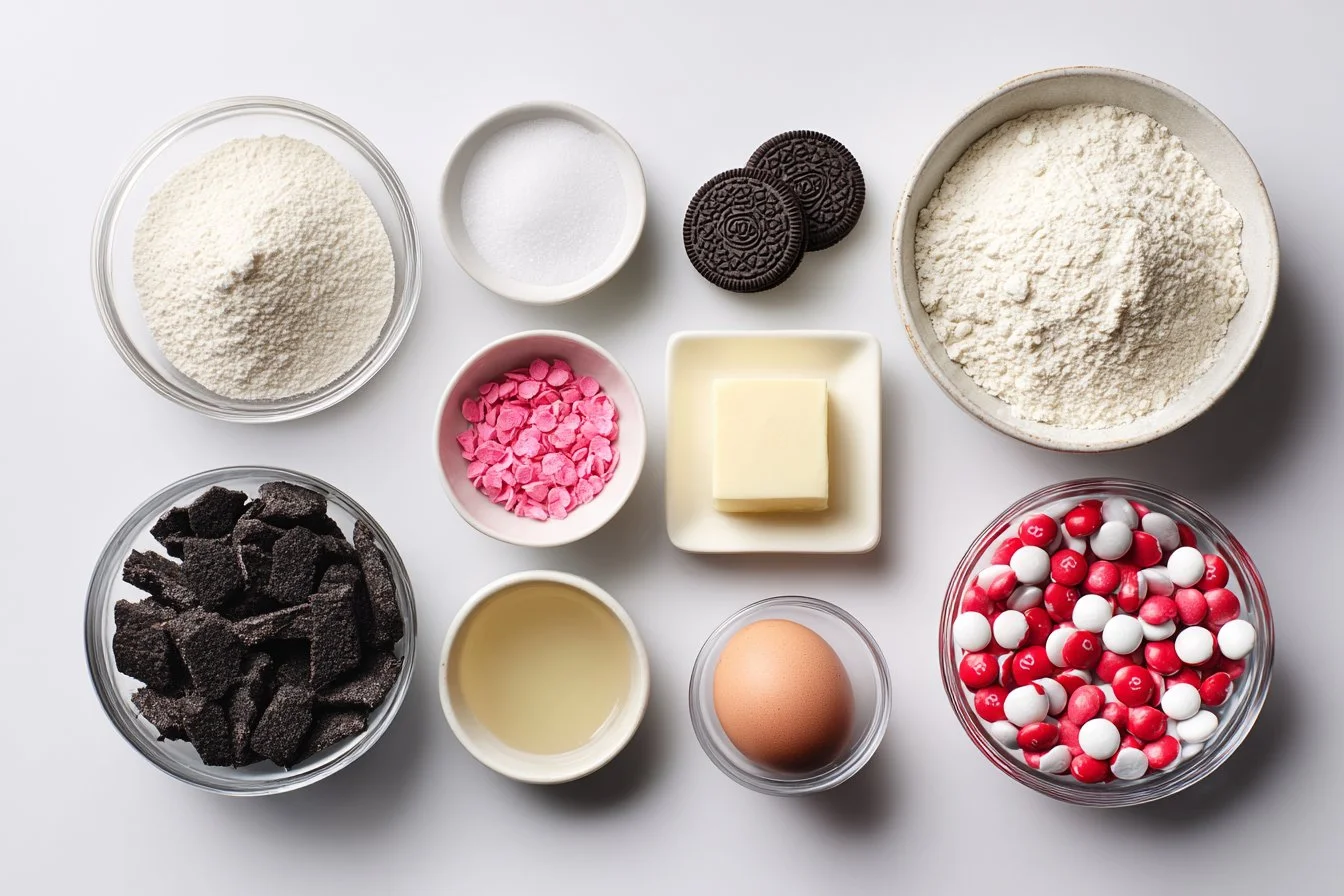
- 1 cup all-purpose flour (for a gluten-free option, use a 1:1 gluten-free baking flour)
- 1/2 teaspoon baking soda
- 1/4 teaspoon salt
- 1/2 cup unsalted butter, softened (try coconut oil for a dairy-free version)
- 1/2 cup brown sugar (light or dark, based on your preference)
- 1/4 cup granulated sugar
- 1 large egg (for vegan, use flaxseed meal or a chia seed replacement)
- 1 teaspoon vanilla extract (vanilla bean paste works beautifully too)
- 1 cup crushed Oreo cookies (or any chocolate sandwich cookie)
- 1/2 cup M&M’s (in festive colors, or substitute with chocolate chips)
{image_template}
Do This, Then This: The Foolproof Step-by-Step
- Preheat your oven to 350°F (175°C) and line a baking sheet with parchment paper to prevent sticking.
- In a mixing bowl, whisk together the flour, baking soda, and salt until well combined.
- In another bowl, cream the softened butter along with the brown sugar and granulated sugar until smooth and fluffy.
- Incorporate the egg and vanilla extract into the butter mixture, beating until well mixed.
- Gradually fold in the dry mixture, being careful not to over-mix to maintain that tender texture.
- Gently fold in the crushed cookies and colorful M&M’s, ensuring an even distribution of flavors.
- Drop rounded tablespoons of dough onto your baking sheet, allowing about 2 inches of space between each for spreading.
- Bake for 10-12 minutes or until the edges turn a beautiful golden brown but the centers remain soft.
- Allow cookies to cool on the pan for a few minutes before moving them to a wire rack to cool completely.
Flavor + Texture: What You Should Notice in Every Bite
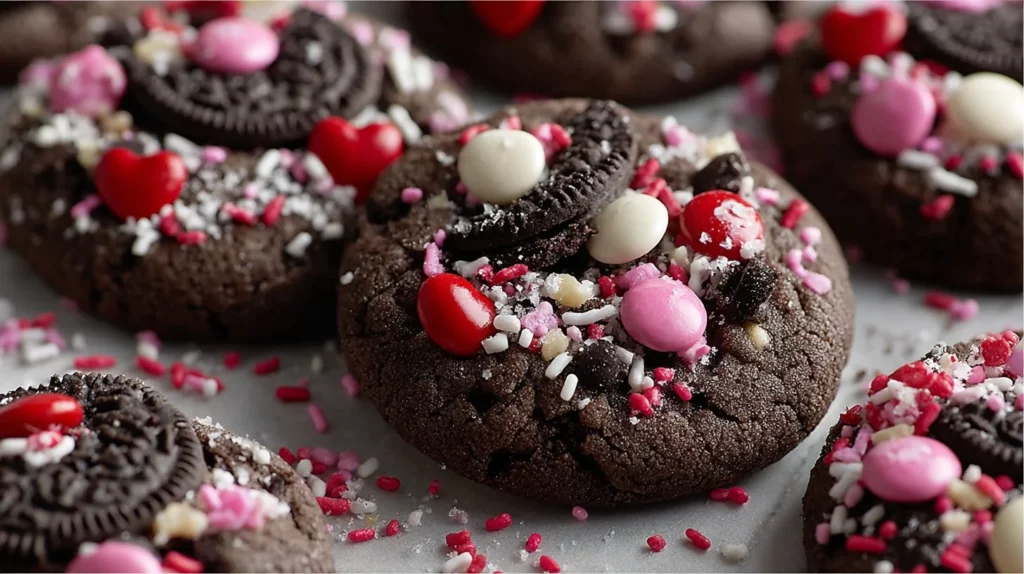
Each bite should offer a rich, buttery flavor intertwined with the deep chocolate notes from the crushed cookies. Expect a delightful contrast between the crisp edges and a soft, chewy center, enhanced by the bits of M&M’s that add a pop of sweetness and color. If you prefer a more chocolate-forward experience, consider swapping in chocolate chips or using dark chocolate cookies. Adjust the baking time slightly to ensure your desired texture is achieved—longer for more crunch, shorter for that gooey feel.
Make Your Cookies Extra Chewy with Brown Sugar
Using more brown sugar than granulated sugar enhances the moisture in your cookies, making them fabulously chewy. For an extra rich flavor, consider browning the butter before incorporating it into the sugar mix. This adds depth through caramelized notes, giving you that luxurious bakery-style bite. Remember to keep an eye on your oven; cookies can go from perfect to overdone in minutes, so start checking at 10 minutes to achieve the desired chewy texture.
Get Creative with Fun Mix-Ins for Your Dough
Elevate your cookie game by experimenting with fun mix-ins. Introducing different flavored chocolate chips—like peanut butter or mint—or incorporating chopped nuts can add dimension to your cookies. Additionally, adding a sprinkle of sea salt atop each cookie before baking enhances the sweetness and balances flavors beautifully. For an even more festive flair, consider adding seasonal sprinkles or chocolate drizzle once the cookies have cooled, transforming them into a vibrant treat for any celebration.
Perfectly Portion and Shape for Even Baking
To ensure that all your cookies bake evenly, use a cookie scoop or a tablespoon for consistent sizing. This guarantees that each cookie has the same amount of dough, resulting in uniform baking. Space your cookies adequately on the baking sheet—about 2 inches apart—to allow room for spreading. If you prefer extra thick cookies, refrigerating the dough for 30 minutes prior to baking can help them hold their shape. The result will be cookies that are both chewy and substantial, rather than thin and overly crispy.
Tips to Store Your Cookies for Freshness
To keep your cookies fresh longer, store them in an airtight container at room temperature. Ideally, layer parchment paper between layers of cookies to prevent them from sticking together. If you’re looking to save some for later, these cookies freeze beautifully! Place them in a freezer bag, separating layers with parchment and pop them in the freezer. When you’re ready to indulge, transfer however many you want to the fridge to defrost overnight or allow them to come to room temperature on the counter for about an hour.
Common Mistakes (And the Fast Fix for Each One)
- Overmixing the dough: This can lead to tough cookies. Mix just until combined.
- Not using room temperature ingredients: Cold butter or eggs can cause uneven mixing. Ensure they’re at room temperature.
- Baking too long: Keep an eye on the time; golden edges and a soft center indicate they’re done.
- Using too much flour: Spoon and level flour into your measuring cup to avoid excess.
- Not cooling before transferring: Let cookies set on the baking sheet for a few minutes to avoid them crumbling apart.
Make It Yours: 6 Variations That Still Keep the Recipe Solid
- Peanut Butter Swirl: Add swirls of creamy peanut butter into the dough before baking for extra flavor.
- Nutty For Hazelnuts: Toss in chopped hazelnuts for a gourmet twist.
- Mint Chocolate Delight: Use mint-flavored M&M’s or add peppermint extract for a fresh take.
- Dark Chocolate Lovers: Substitute Oreos with dark chocolate sandwich cookies for a richer taste.
- Cherry-Cocoa Fusion: Incorporate dried cherries for a sweet-tart balance with your chocolate base.
- Lemon Zest Burst: Add a hint of lemon zest for a bright counterpoint to the sweetness.
Quick Answers Before You Start
Can I prepare the dough ahead of time?
Absolutely! You can make the dough a day in advance and store it in the refrigerator. Just allow it to come to room temperature for about 15 minutes before baking.
Can I freeze these cookies after baking?
Yes, they freeze well! Once cooled, store them in freezer bags for up to three months. Thaw them at room temperature before serving.
Are there gluten-free options available?
Definitely! Substitute regular flour with a gluten-free blend; just ensure it’s a 1:1 ratio to maintain the textural integrity.
How can I make these cookies dairy-free?
Swap the unsalted butter with dairy-free alternatives such as coconut oil or vegan butter for a creamy flavor without the dairy.
What if my cookies spread too much?
This could be due to warm dough or too little flour. Ensure your butter is softened but not too melty, and measure your flour correctly by spooning it into the cup.
How can I make the cookies more festive for holidays?
Incorporate colorful sprinkles, themed M&M’s, or drizzle with chocolate for a visually appealing treat that matches the occasion perfectly.
Final Notes (So You Nail It the First Time)
Dive into these cookie delights with confidence knowing you have all the tools and tips to achieve cookie perfection. Whether it’s to celebrate love or friendship, these treats promise to please. So roll up your sleeves and get baking tonight—you won’t regret it!
Ultimate Celebration Cookies
Ingredients
Method
- Preheat your oven to 350°F (175°C) and line a baking sheet with parchment paper.
- In a mixing bowl, whisk together the flour, baking soda, and salt until well combined.
- In another bowl, cream the softened butter with the brown sugar and granulated sugar until smooth and fluffy.
- Incorporate the egg and vanilla extract into the butter mixture, beating until well mixed.
- Gradually fold in the dry mixture, being careful not to over-mix.
- Gently fold in the crushed cookies and colorful M&M’s.
- Drop rounded tablespoons of dough onto your baking sheet, allowing about 2 inches of space between each.
- Bake for 10-12 minutes until the edges turn golden brown but the centers remain soft.
- Allow cookies to cool on the pan for a few minutes before transferring to a wire rack to cool completely.